快速入门: Ionic Vue
介绍
这个例子提供了建立一个基本用户管理应用程序的步骤。它包括。
- MemFire Cloud Database:一个用于存储用户数据的Postgres数据库。
- MemFire Cloud Auth:用户可以用魔法链接登录(没有密码,只有电子邮件)。
- MemFire Cloud 存储:用户可以上传照片。
- 行级安全:数据受到保护,个人只能访问自己的数据。
- 即时APIs。当你创建你的数据库表时,API将自动生成。
在本指南结束时,你将拥有一个允许用户登录和更新一些基本档案细节的应用程序。
GitHub#
如果你在阅读指南时遇到困难,请参考此版本。
项目设置
在我们开始构建之前,我们要设置我们的数据库和API。这就像在Supabase中启动一个新项目一样简单 然后在数据库中创建一个 "模式"。
创建一个项目
- 进入MemFire Cloud。
- 点击 "新项目"。
- 输入你的项目细节。
- 等待新数据库的启动。
设置数据库模式
现在我们要设置数据库模式。我们可以使用SQL编辑器中的 "用户管理"的模板快速启动。 或者你可以直接复制/粘贴下面的SQL,然后自己运行它。
- 进入仪表版中的SQL编辑器页面。
- 点击 用户管理的模板。
- 点击 运行。
获取API密钥#
现在你已经创建了一些数据库表,你已经准备好使用自动生成的API插入数据。
我们只需要从API设置中获得URL和anon密钥。
- 进入仪表板中的设置页面。
- 单击侧边栏中的API。
- 在这个页面上找到你的API
URL、anon和service_role键。
构建应用程序
让我们开始从头开始构建Vue应用程序。
初始化一个Ionic Vue应用程序#
我们可以使用Ionic CLI来初始化
一个名为supabase-ionic-vue的应用程序。
npm install -g @ionic/cli
ionic start supabase-ionic-vue blank --type vue
cd supabase-ionic-vue
然后让我们安装唯一的额外依赖:supabase-js
npm install @supabase/supabase-js
最后,我们要把环境变量保存在.env中。
我们所需要的是API URL和你[早些时候]复制的anon密钥(#get-theapi-keys)。
.envVUE_APP_SUPABASE_URL=YOUR_SUPABASE_URL
VUE_APP_SUPABASE_ANON_KEY=YOUR_SUPABASE_ANON_KEY
现在我们已经有了API凭证,让我们创建一个辅助文件来初始化Supabase客户端。这些变量将被暴露在 在浏览器上,这完全没有问题,因为我们的数据库已经启用了行级安全。
src/supabase.ts"1import { createClient } from '@supabase/supabase-js';
2
3const supabaseUrl = process.env.VUE_APP_SUPABASE_URL as string;
4const supabaseAnonKey = process.env.VUE_APP_SUPABASE_ANON_KEY as string;
5
6export const supabase = createClient(supabaseUrl, supabaseAnonKey);
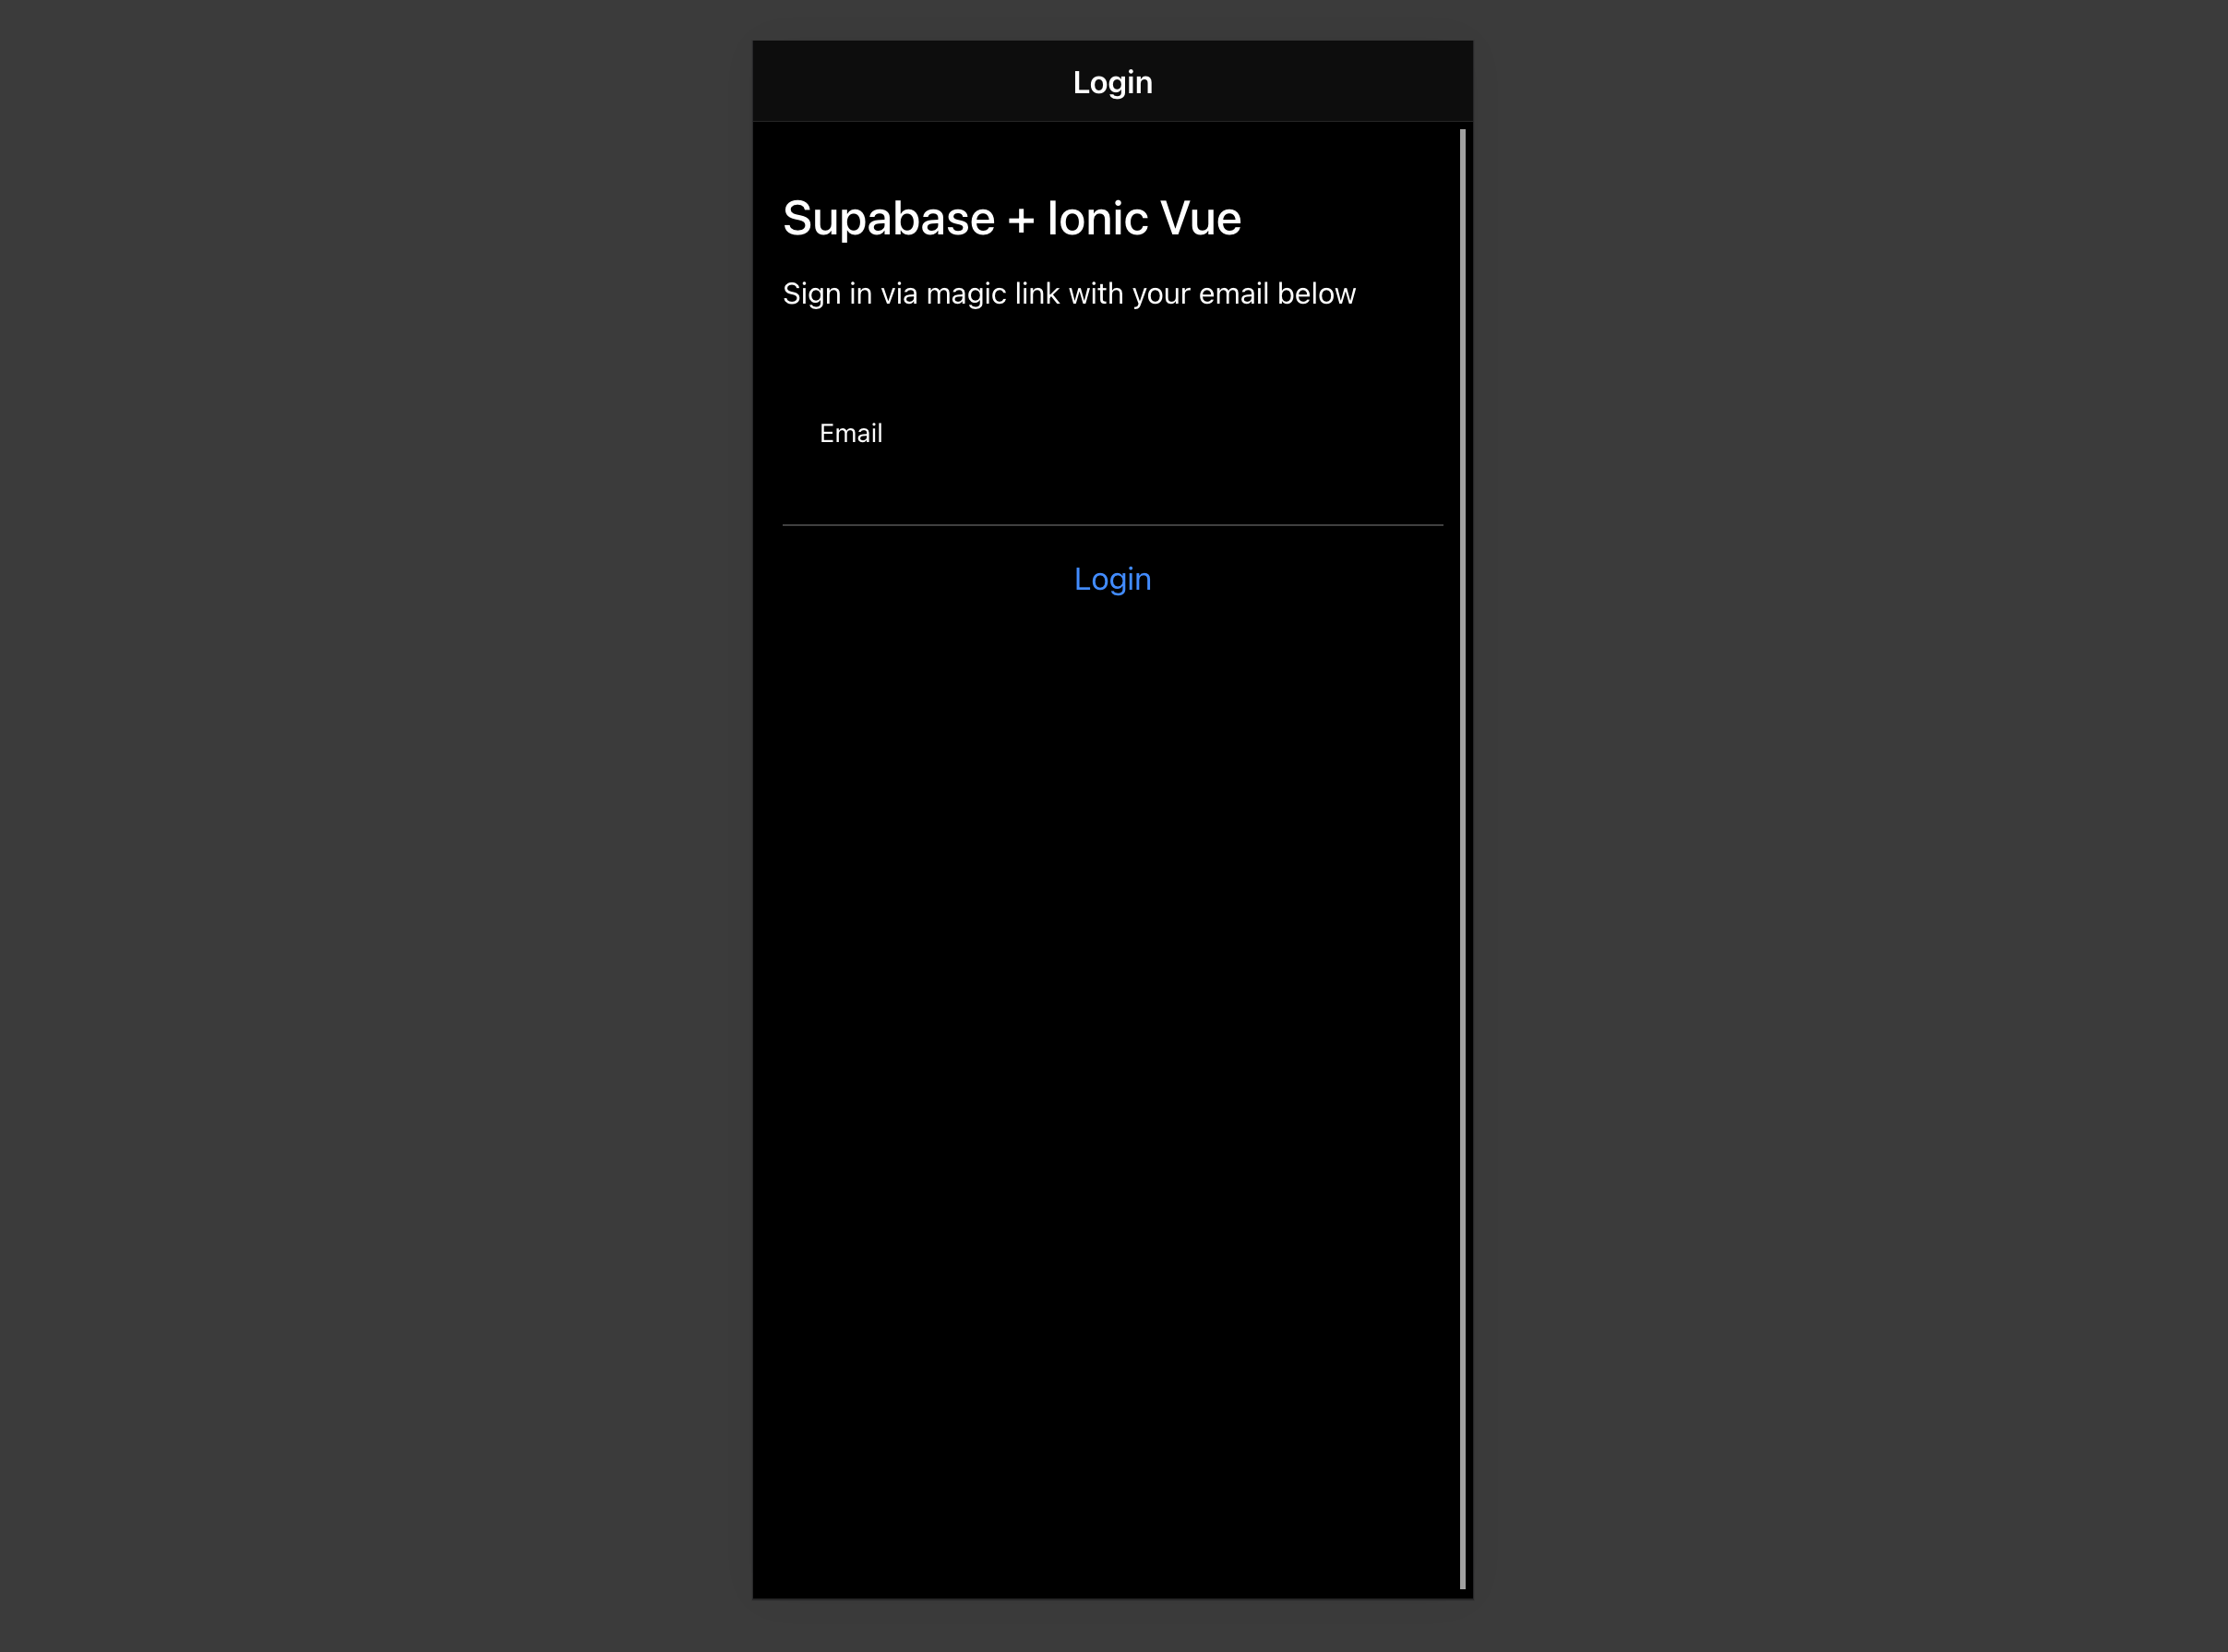
设置一个登录路由
让我们建立一个Vue组件来管理登录和注册。我们将使用Magic Links,所以用户可以用他们的电子邮件登录,而不需要使用密码。
/src/views/Login.vue1<template>
2  <ion-page>
3    <ion-header>
4      <ion-toolbar>
5        <ion-title>Login</ion-title>
6      </ion-toolbar>
7    </ion-header>
8
9    <ion-content>
10      <div class="ion-padding">
11        <h1>Supabase + Ionic Vue</h1>
12        <p>Sign in via magic link with your email below</p>
13      </div>
14      <ion-list inset="true">
15        <form @submit.prevent="handleLogin">
16          <ion-item>
17            <ion-label position="stacked">Email</ion-label>
18            <ion-input v-model="email" name="email" autocomplete type="email"></ion-input>
19          </ion-item>
20          <div class="ion-text-center">
21            <ion-button type="submit" fill="clear">Login</ion-button>
22          </div>
23        </form>
24      </ion-list>
25      <p>{{email}}</p>
26    </ion-content>
27  </ion-page>
28</template>
29
30<script lang="ts">
31  import { supabase } from '../supabase'
32  import {
33    IonContent,
34    IonHeader,
35    IonPage,
36    IonTitle,
37    IonToolbar,
38    IonList,
39    IonItem,
40    IonLabel,
41    IonInput,
42    IonButton,
43    toastController,
44    loadingController,
45  } from '@ionic/vue'
46  import { defineComponent, ref } from 'vue'
47
48  export default defineComponent({
49    name: 'LoginPage',
50    components: {
51      IonContent,
52      IonHeader,
53      IonPage,
54      IonTitle,
55      IonToolbar,
56      IonList,
57      IonItem,
58      IonLabel,
59      IonInput,
60      IonButton,
61    },
62    setup() {
63      const email = ref('')
64      const handleLogin = async () => {
65        const loader = await loadingController.create({})
66        const toast = await toastController.create({ duration: 5000 })
67
68        try {
69          await loader.present()
70          const { error } = await supabase.auth.signIn({ email: email.value })
71
72          if (error) throw error
73
74          toast.message = 'Check your email for the login link!'
75          await toast.present()
76        } catch (error: any) {
77          toast.message = error.error_description || error.message
78          await toast.present()
79        } finally {
80          await loader.dismiss()
81        }
82      }
83      return { handleLogin, email }
84    },
85  })
86</script>
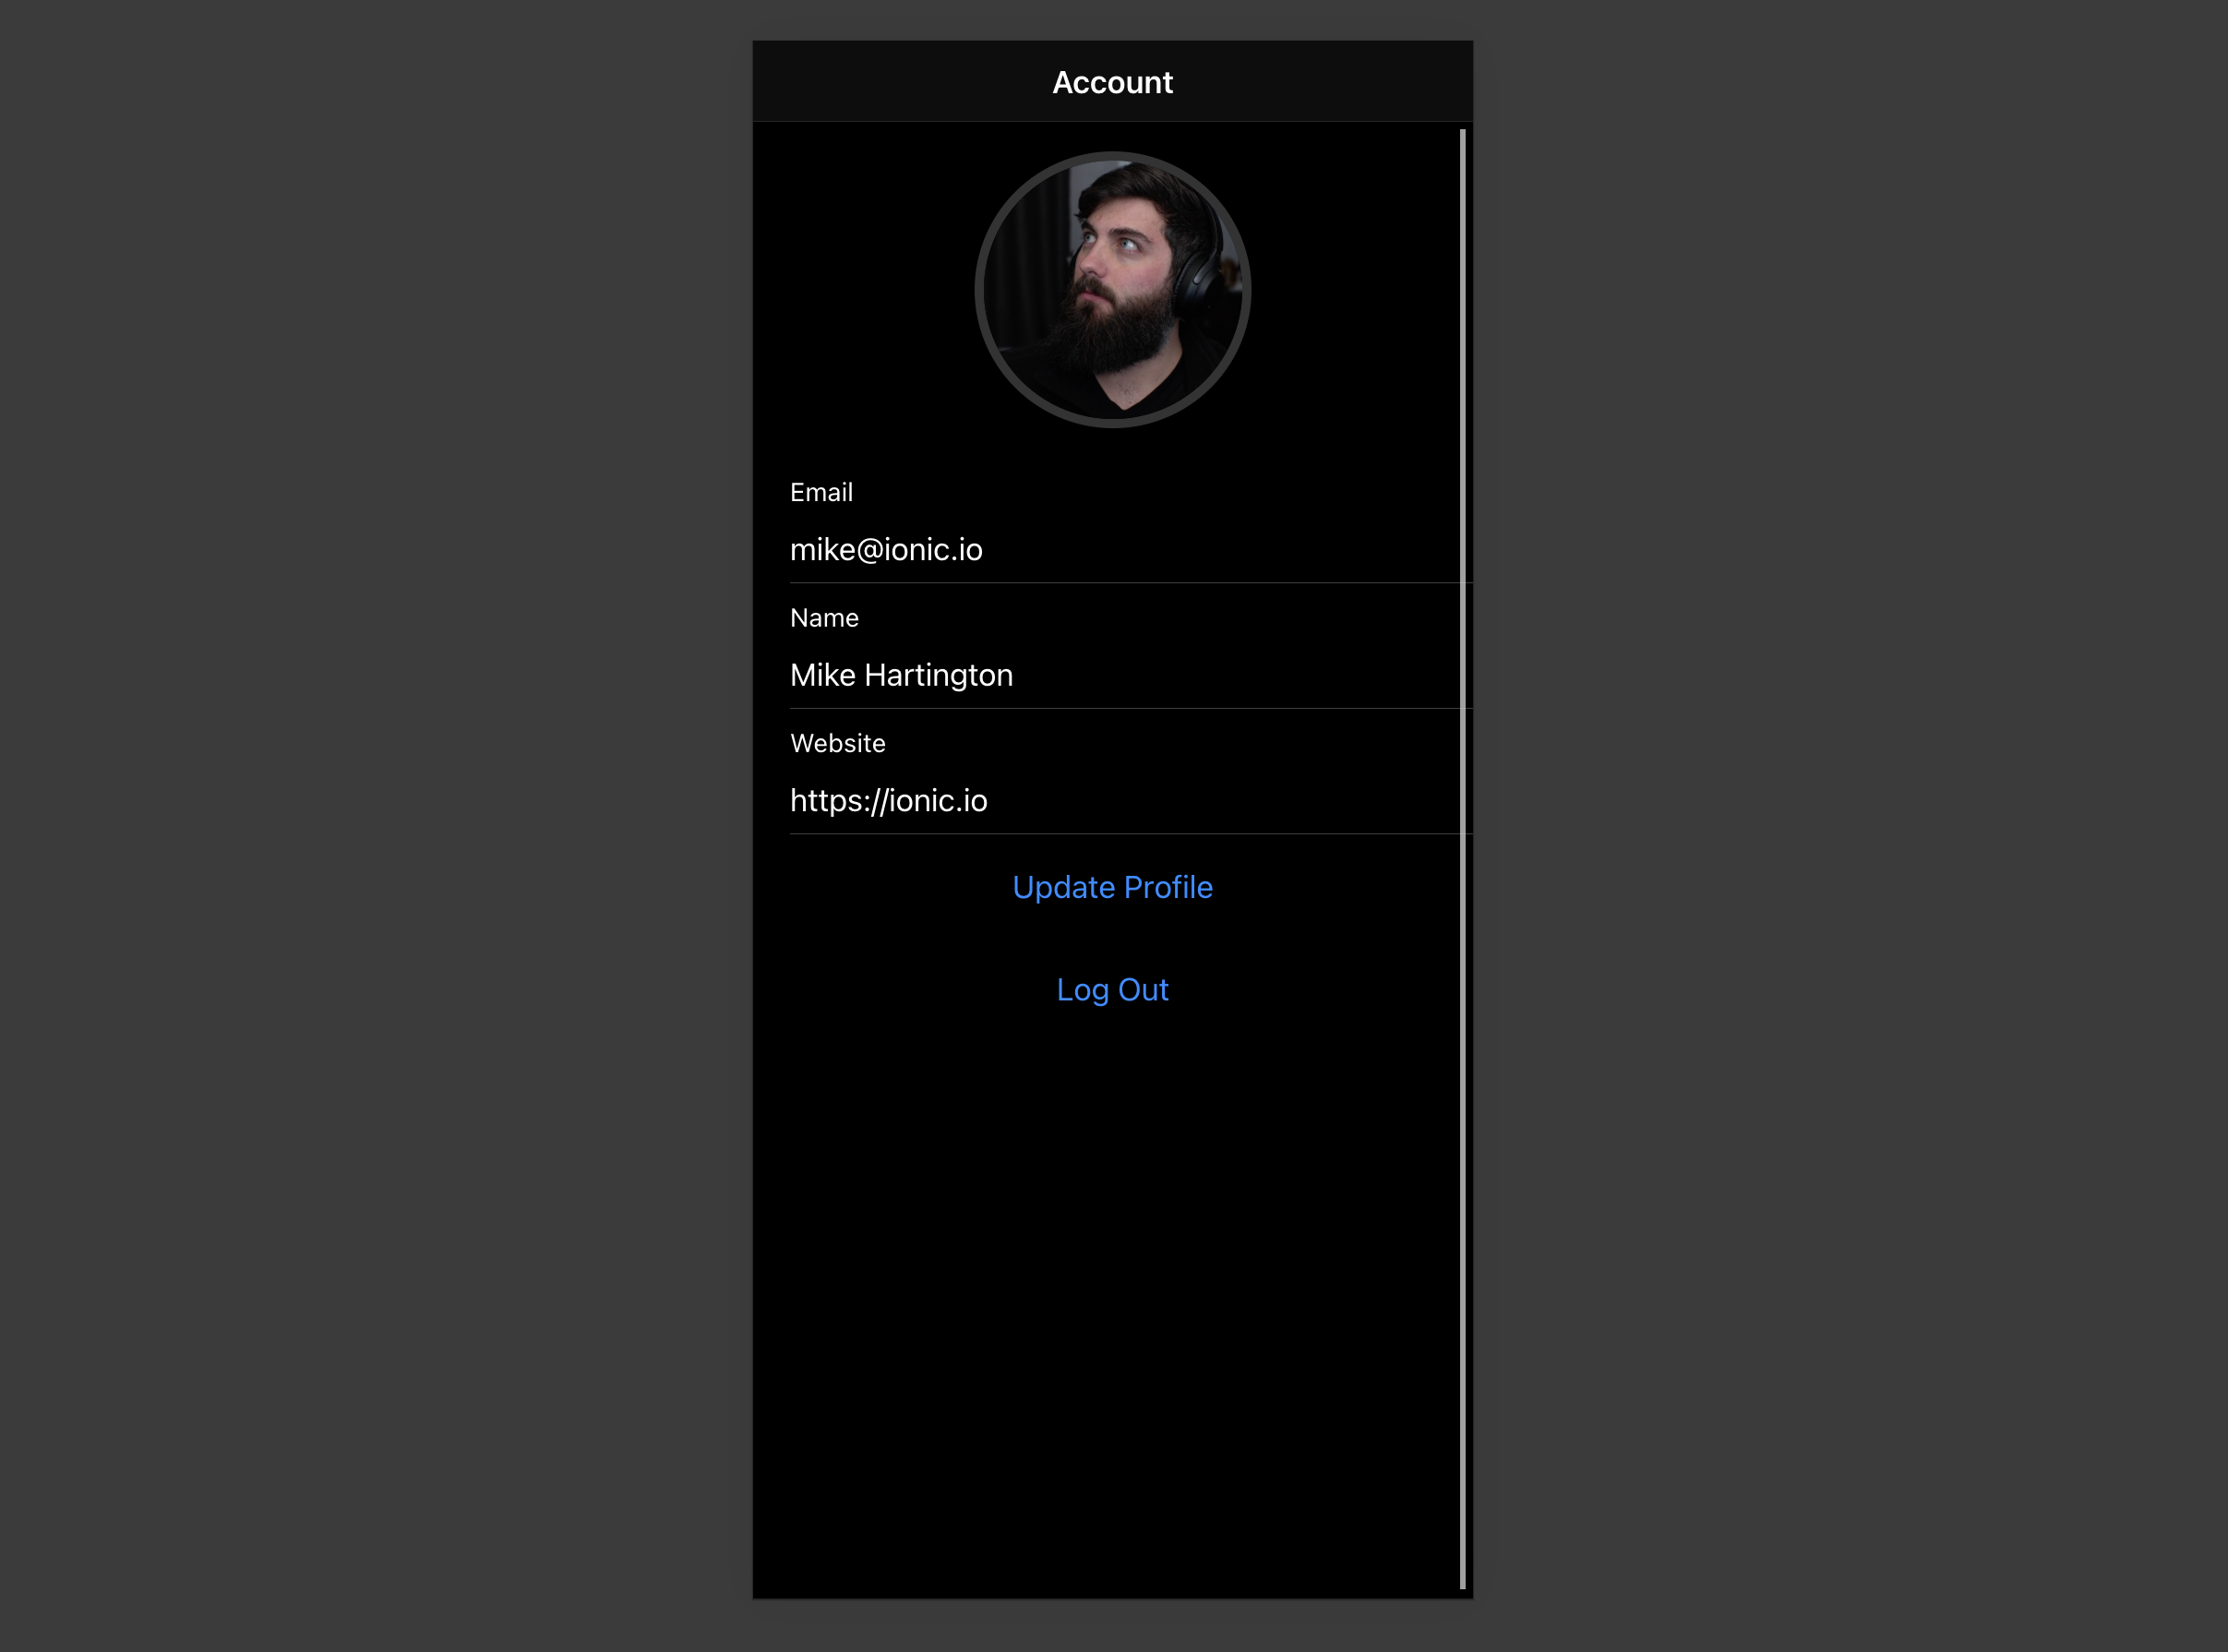
账号页面
在用户登录后,我们可以让他们编辑他们的个人资料细节和管理他们的账户。
让我们为其创建一个新的组件,名为Account.vue。
src/views/Account.vue1<template>
2  <ion-page>
3    <ion-header>
4      <ion-toolbar>
5        <ion-title>Account</ion-title>
6      </ion-toolbar>
7    </ion-header>
8
9    <ion-content>
10      <form @submit.prevent="updateProfile">
11        <ion-item>
12          <ion-label>
13            <p>Email</p>
14            <p>{{ session?.user?.email }}</p>
15          </ion-label>
16        </ion-item>
17
18        <ion-item>
19          <ion-label position="stacked">Name</ion-label>
20          <ion-input type="text" name="username" v-model="profile.username"></ion-input>
21        </ion-item>
22
23        <ion-item>
24          <ion-label position="stacked">Website</ion-label>
25          <ion-input type="url" name="website" v-model="profile.website"></ion-input>
26        </ion-item>
27        <div class="ion-text-center">
28          <ion-button fill="clear" type="submit">Update Profile</ion-button>
29        </div>
30      </form>
31
32      <div class="ion-text-center">
33        <ion-button fill="clear" @click="signOut">Log Out</ion-button>
34      </div>
35    </ion-content>
36  </ion-page>
37</template>
38
39<script lang="ts">
40  import { store } from '@/store'
41  import { supabase } from '@/supabase'
42  import {
43    IonContent,
44    IonHeader,
45    IonPage,
46    IonTitle,
47    IonToolbar,
48    toastController,
49    loadingController,
50    IonInput,
51    IonItem,
52    IonButton,
53    IonLabel,
54  } from '@ionic/vue'
55  import { User } from '@supabase/supabase-js'
56  import { defineComponent, onMounted, ref } from 'vue'
57  export default defineComponent({
58    name: 'AccountPage',
59    components: {
60      IonContent,
61      IonHeader,
62      IonPage,
63      IonTitle,
64      IonToolbar,
65      IonInput,
66      IonItem,
67      IonButton,
68      IonLabel,
69    },
70    setup() {
71      const session = ref(supabase.auth.session())
72      const profile = ref({
73        username: '',
74        website: '',
75        avatar_url: '',
76      })
77      const user = store.user as User
78      async function getProfile() {
79        const loader = await loadingController.create({})
80        const toast = await toastController.create({ duration: 5000 })
81        await loader.present()
82        try {
83          let { data, error, status } = await supabase
84            .from('profiles')
85            .select(`username, website, avatar_url`)
86            .eq('id', user.id)
87            .single()
88
89          if (error && status !== 406) throw error
90
91          if (data) {
92            console.log(data)
93            profile.value = {
94              username: data.username,
95              website: data.website,
96              avatar_url: data.avatar_url,
97            }
98          }
99        } catch (error: any) {
100          toast.message = error.message
101          await toast.present()
102        } finally {
103          await loader.dismiss()
104        }
105      }
106
107      const updateProfile = async () => {
108        const loader = await loadingController.create({})
109        const toast = await toastController.create({ duration: 5000 })
110        try {
111          await loader.present()
112          const updates = {
113            id: user.id,
114            ...profile.value,
115            updated_at: new Date(),
116          }
117          //
118          let { error } = await supabase.from('profiles').upsert(updates, {
119            returning: 'minimal', // Don't return the value after inserting
120          })
121          //
122          if (error) throw error
123        } catch (error: any) {
124          toast.message = error.message
125          await toast.present()
126        } finally {
127          await loader.dismiss()
128        }
129      }
130
131      async function signOut() {
132        const loader = await loadingController.create({})
133        const toast = await toastController.create({ duration: 5000 })
134        await loader.present()
135        try {
136          let { error } = await supabase.auth.signOut()
137          if (error) throw error
138        } catch (error: any) {
139          toast.message = error.message
140          await toast.present()
141        } finally {
142          await loader.dismiss()
143        }
144      }
145
146      onMounted(() => {
147        getProfile()
148      })
149      return { signOut, profile, session, updateProfile }
150    },
151  })
152</script>
启动
现在我们已经有了所有的组件,让我们来更新App.vue和我们的路由:
src/router.index.ts1import { createRouter, createWebHistory } from '@ionic/vue-router'
2import { RouteRecordRaw } from 'vue-router'
3import LoginPage from '../views/Login.vue'
4import AccountPage from '../views/Account.vue'
5const routes: Array<RouteRecordRaw> = [
6  {
7    path: '/',
8    name: 'Login',
9    component: LoginPage,
10  },
11  {
12    path: '/account',
13    name: 'Account',
14    component: AccountPage,
15  },
16]
17
18const router = createRouter({
19  history: createWebHistory(process.env.BASE_URL),
20  routes,
21})
22
23export default router
src/App.vue1<template>
2  <ion-app>
3    <ion-router-outlet />
4  </ion-app>
5</template>
6
7<script lang="ts">
8  import { IonApp, IonRouterOutlet, useIonRouter } from '@ionic/vue'
9  import { defineComponent } from 'vue'
10
11  import { store } from './store'
12  import { supabase } from './supabase'
13
14  export default defineComponent({
15    name: 'App',
16    components: {
17      IonApp,
18      IonRouterOutlet,
19    },
20    setup() {
21      const router = useIonRouter()
22      store.user = supabase.auth.user() ?? {}
23      supabase.auth.onAuthStateChange((_, session) => {
24        store.user = session?.user ?? {}
25        if (session?.user) {
26          router.replace('/account')
27        }
28      })
29    },
30  })
31</script>
一旦完成,在终端窗口运行这个程序。
ionic serve
然后打开浏览器到localhost:3000,你应该看到完成的应用程序。
个人照片
每个Supabase项目都配置了存储,用于管理照片和视频等大文件。
创建一个上传小组件
首先安装两个软件包,以便与用户的相机互动。
npm install @ionic/pwa-elements @capacitor/camera
CapacitorJS是Ionic的一个跨平台原生运行时间,它使网络应用通过应用商店部署,并提供对原生deavice API的访问。
Ionic PWA元素是一个配套的软件包,它将对某些不提供用户界面的浏览器API进行聚填,并提供自定义的Ionic UI。
安装了这些包后,我们可以更新我们的main.ts,以包括对Ionic PWA元素的额外引导调用。
src/main.tsx"1import { createApp } from 'vue'
2import App from './App.vue'
3import router from './router'
4
5import { IonicVue } from '@ionic/vue'
6/* Core CSS required for Ionic components to work properly */
7import '@ionic/vue/css/ionic.bundle.css'
8
9/* Theme variables */
10import './theme/variables.css'
11
12import { defineCustomElements } from '@ionic/pwa-elements/loader'
13defineCustomElements(window)
14const app = createApp(App).use(IonicVue).use(router)
15
16router.isReady().then(() => {
17  app.mount('#app')
18})
然后创建一个AvatarComponent。
src/components/Avatar.vue1<template>
2  <div class="avatar">
3    <div class="avatar_wrapper" @click="uploadAvatar">
4      <img v-if="avatarUrl" :src="avatarUrl" />
5      <ion-icon v-else name="person" class="no-avatar"></ion-icon>
6    </div>
7  </div>
8</template>
9
10<script lang="ts">
11  import { ref, toRefs, watch, defineComponent } from 'vue'
12  import { supabase } from '../supabase'
13  import { Camera, CameraResultType } from '@capacitor/camera'
14  import { IonIcon } from '@ionic/vue'
15  import { person } from 'ionicons/icons'
16  export default defineComponent({
17    name: 'AppAvatar',
18    props: { path: String },
19    emits: ['upload', 'update:path'],
20    components: { IonIcon },
21    setup(prop, { emit }) {
22      const { path } = toRefs(prop)
23      const avatarUrl = ref('')
24
25      const downloadImage = async () => {
26        try {
27          const { data, error } = await supabase.storage.from('avatars').download(path.value)
28          if (error) throw error
29          avatarUrl.value = URL.createObjectURL(data!)
30        } catch (error: any) {
31          console.error('Error downloading image: ', error.message)
32        }
33      }
34
35      const uploadAvatar = async () => {
36        try {
37          const photo = await Camera.getPhoto({
38            resultType: CameraResultType.DataUrl,
39          })
40          if (photo.dataUrl) {
41            const file = await fetch(photo.dataUrl)
42              .then((res) => res.blob())
43              .then((blob) => new File([blob], 'my-file', { type: `image/${photo.format}` }))
44
45            const fileName = `${Math.random()}-${new Date().getTime()}.${photo.format}`
46            let { error: uploadError } = await supabase.storage
47              .from('avatars')
48              .upload(fileName, file)
49            if (uploadError) {
50              throw uploadError
51            }
52            emit('update:path', fileName)
53            emit('upload')
54          }
55        } catch (error) {
56          console.log(error)
57        }
58      }
59
60      watch(path, () => {
61        if (path.value) downloadImage()
62      })
63
64      return { avatarUrl, uploadAvatar, person }
65    },
66  })
67</script>
68<style>
69  .avatar {
70    display: block;
71    margin: auto;
72    min-height: 150px;
73  }
74  .avatar .avatar_wrapper {
75    margin: 16px auto 16px;
76    border-radius: 50%;
77    overflow: hidden;
78    height: 150px;
79    aspect-ratio: 1;
80    background: var(--ion-color-step-50);
81    border: thick solid var(--ion-color-step-200);
82  }
83  .avatar .avatar_wrapper:hover {
84    cursor: pointer;
85  }
86  .avatar .avatar_wrapper ion-icon.no-avatar {
87    width: 100%;
88    height: 115%;
89  }
90  .avatar img {
91    display: block;
92    object-fit: cover;
93    width: 100%;
94    height: 100%;
95  }
96</style>
添加新的小组件
然后我们就可以把这个小部件添加到账号页面:
src/views/Account.vue1<template>
2  <ion-page>
3    <ion-header>
4      <ion-toolbar>
5        <ion-title>Account</ion-title>
6      </ion-toolbar>
7    </ion-header>
8
9    <ion-content>
10      <avatar v-model:path="profile.avatar_url" @upload="updateProfile"></avatar>
11...
12</template>
13<script lang="ts">
14import Avatar from '../components/Avatar.vue';
15export default defineComponent({
16  name: 'AccountPage',
17  components: {
18    Avatar,
19    ....
20  }
21
22</script>
下一步
在这个阶段,你已经有了一个功能完备的应用程序!
- 有问题吗?在此提问.
- 请登录MemFire Cloud