快速入门: Angular
介绍
这个例子提供了建立一个基本用户管理应用程序的步骤。它包括。
- MemFire Cloud Database:一个用于存储用户数据的Postgres数据库。
- MemFire Cloud Auth:用户可以用魔法链接登录(没有密码,只有电子邮件)。
- MemFire Cloud 存储:用户可以上传照片。
- 行级安全:数据受到保护,个人只能访问自己的数据。
- 即时APIs。当你创建你的数据库表时,API将自动生成。
在本指南结束时,你将拥有一个允许用户登录和更新一些基本档案细节的应用程序。

GitHub#
如果你在阅读指南时遇到困难,请参考此版本
项目设置
在我们开始构建之前,我们要设置我们的数据库和API。这就像在Supabase中启动一个新项目一样简单 然后在数据库中创建一个 "模式"。
创建一个项目
- 进入MemFire Cloud。
- 点击 "新项目"。
- 输入你的项目细节。
- 等待新数据库的启动。
设置数据库模式
现在我们要设置数据库模式。我们可以使用SQL编辑器中的 "用户管理"的模板快速启动。 或者你可以直接复制/粘贴下面的SQL,然后自己运行它。
- 进入仪表版中的SQL编辑器页面。
- 点击 用户管理的模板。
- 点击 运行。
获取API密钥#
现在你已经创建了一些数据库表,你已经准备好使用自动生成的API插入数据。
我们只需要从API设置中获得URL和anon密钥。
- 进入仪表板中的设置页面。
- 单击侧边栏中的API。
- 在这个页面上找到你的API
URL、anon和service_role键。
构建应用程序
让我们开始从头开始构建Angular应用程序。
初始化一个Angular应用程序#
我们可以使用[Angular CLI](https://angular.io/cli)来初始化 一个名为`supabase-angular'的应用程序:
npx ng new supabase-angular --routing false --style css
cd supabase-angular
然后让我们安装唯一的额外依赖:supabase-js
npm install @supabase/supabase-js
最后我们要在environment.ts文件中保存环境变量。
我们所需要的是API URL和你[早些时候]复制的anon密钥(#get-theapi-keys)。
这些变量将暴露在浏览器上,这完全没有问题,因为我们在数据库上启用了行级安全。
environment.ts1export const environment = {
2  production: false,
3  supabaseUrl: 'YOUR_SUPABASE_URL',
4  supabaseKey: 'YOUR_SUPABASE_KEY',
5}
现在我们已经有了API凭证,让我们用ng g s supabase创建一个SupabaseService,以初始化Supabase客户端并实现与Supabase API通信的功能。
src/app/supabase.service.ts1import { Injectable } from '@angular/core'
2import {
3  AuthChangeEvent,
4  AuthSession,
5  createClient,
6  Session,
7  SupabaseClient,
8  User,
9} from '@supabase/supabase-js'
10import { environment } from 'src/environments/environment'
11import { Database } from 'src/schema'
12
13export interface Profile {
14  id?: string
15  username: string
16  website: string
17  avatar_url: string
18}
19
20@Injectable({
21  providedIn: 'root',
22})
23export class SupabaseService {
24  private supabase: SupabaseClient
25  _session: AuthSession | null = null
26
27  constructor() {
28    this.supabase = createClient(environment.supabaseUrl, environment.supabaseKey)
29  }
30
31  get session() {
32    this.supabase.auth.getSession().then(({ data }) => {
33      this._session = data.session
34    })
35    return this._session
36  }
37
38  profile(user: User) {
39    return this.supabase
40      .from('profiles')
41      .select(`username, website, avatar_url`)
42      .eq('id', user.id)
43      .single()
44  }
45
46  authChanges(callback: (event: AuthChangeEvent, session: Session | null) => void) {
47    return this.supabase.auth.onAuthStateChange(callback)
48  }
49
50  signIn(email: string) {
51    return this.supabase.auth.signInWithOtp({ email })
52  }
53
54  signOut() {
55    return this.supabase.auth.signOut()
56  }
57
58  updateProfile(profile: Profile) {
59    const update = {
60      ...profile,
61      updated_at: new Date(),
62    }
63
64    return this.supabase.from('profiles').upsert(update)
65  }
66
67  downLoadImage(path: string) {
68    return this.supabase.storage.from('avatars').download(path)
69  }
70
71  uploadAvatar(filePath: string, file: File) {
72    return this.supabase.storage.from('avatars').upload(filePath, file)
73  }
74}
可以选择更新src/styles.css,为应用程序设置样式。
设置一个登录组件
让我们建立一个Angular组件来管理登录和注册。我们将使用Magic Links,所以用户可以用他们的电子邮件登录,而不需要使用密码。
用ng g c auth Angular CLI命令创建一个AuthComponent。
src/app/auth/auth.component.ts1import { Component, OnInit } from '@angular/core'
2import { FormBuilder } from '@angular/forms'
3import { SupabaseService } from '../supabase.service'
4
5@Component({
6  selector: 'app-auth',
7  templateUrl: './auth.component.html',
8  styleUrls: ['./auth.component.css'],
9})
10export class AuthComponent implements OnInit {
11  loading = false
12
13  signInForm = this.formBuilder.group({
14    email: '',
15  })
16
17  constructor(
18    private readonly supabase: SupabaseService,
19    private readonly formBuilder: FormBuilder
20  ) {}
21
22  ngOnInit(): void {}
23
24  async onSubmit(): Promise<void> {
25    try {
26      this.loading = true
27      const email = this.signInForm.value.email as string
28      const { error } = await this.supabase.signIn(email)
29      if (error) throw error
30      alert('Check your email for the login link!')
31    } catch (error) {
32      if (error instanceof Error) {
33        alert(error.message)
34      }
35    } finally {
36      this.signInForm.reset()
37      this.loading = false
38    }
39  }
40}
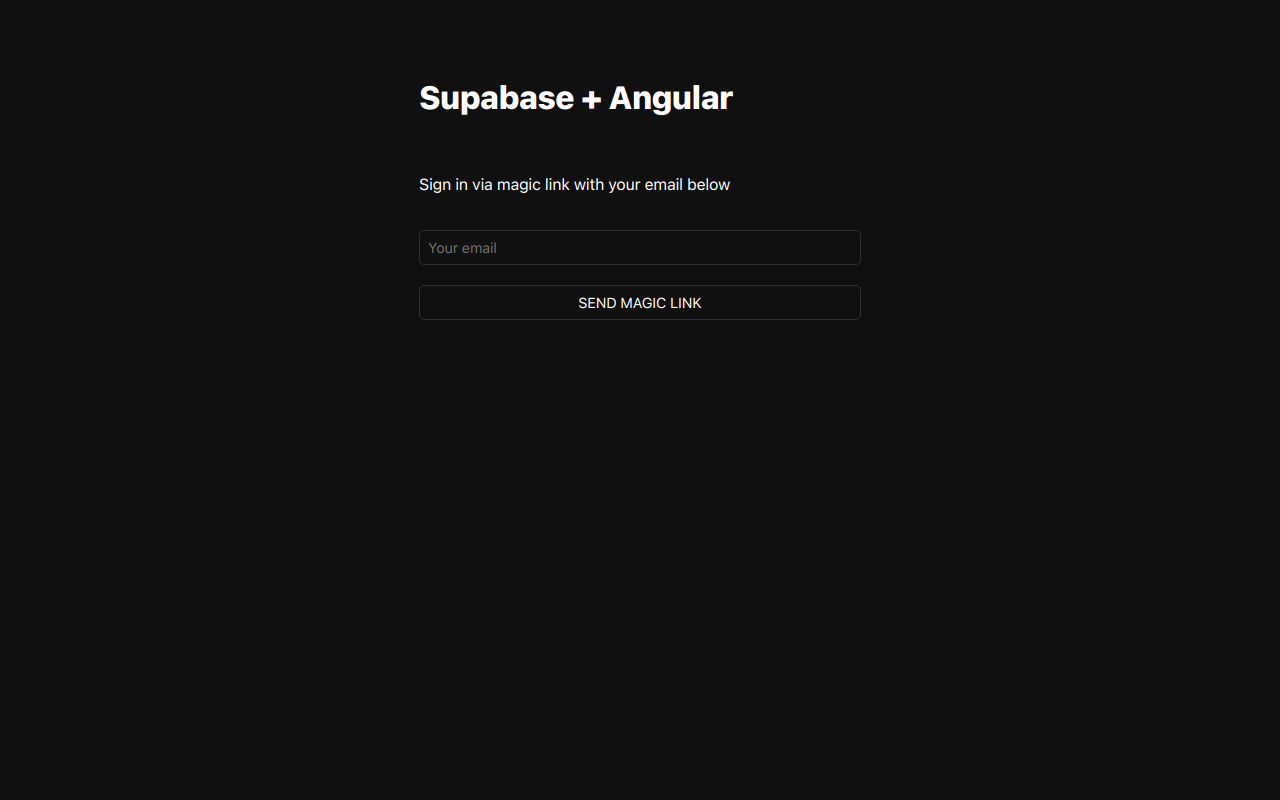
src/app/auth/auth.component.html1<div class="row flex-center flex">
2  <div class="col-6 form-widget" aria-live="polite">
3    <h1 class="header">Supabase + Angular</h1>
4    <p class="description">Sign in via magic link with your email below</p>
5    <form [formGroup]="signInForm" (ngSubmit)="onSubmit()" class="form-widget">
6      <div>
7        <label for="email">Email</label>
8        <input
9          id="email"
10          formControlName="email"
11          class="inputField"
12          type="email"
13          placeholder="Your email"
14        />
15      </div>
16      <div>
17        <button
18          type="submit"
19          class="button block"
20          [disabled]="loading"
21        >
22          {{ loading ? 'Loading' : 'Send magic link' }}
23        </button>
24      </div>
25    </form>
26  </div>
27</div
账号页面
用户还需要一种方法来编辑他们的个人资料细节,并在登录后管理他们的账户。
用ng g c accountAngular CLI命令创建一个AccountComponent。
src/app/account/account.component.ts1import { Component, Input, OnInit } from '@angular/core'
2import { FormBuilder } from '@angular/forms'
3import { AuthSession } from '@supabase/supabase-js'
4import { Profile, SupabaseService } from '../supabase.service'
5
6@Component({
7  selector: 'app-account',
8  templateUrl: './account.component.html',
9  styleUrls: ['./account.component.css'],
10})
11export class AccountComponent implements OnInit {
12  loading = false
13  profile!: Profile
14
15  @Input()
16  session!: AuthSession
17
18  updateProfileForm = this.formBuilder.group({
19    username: '',
20    website: '',
21    avatar_url: '',
22  })
23
24  constructor(private readonly supabase: SupabaseService, private formBuilder: FormBuilder) {}
25
26  async ngOnInit(): Promise<void> {
27    await this.getProfile()
28
29    const { username, website, avatar_url } = this.profile
30    this.updateProfileForm.patchValue({
31      username,
32      website,
33      avatar_url,
34    })
35  }
36
37  async getProfile() {
38    try {
39      this.loading = true
40      const { user } = this.session
41      let { data: profile, error, status } = await this.supabase.profile(user)
42
43      if (error && status !== 406) {
44        throw error
45      }
46
47      if (profile) {
48        this.profile = profile
49      }
50    } catch (error) {
51      if (error instanceof Error) {
52        alert(error.message)
53      }
54    } finally {
55      this.loading = false
56    }
57  }
58
59  async updateProfile(): Promise<void> {
60    try {
61      this.loading = true
62      const { user } = this.session
63
64      const username = this.updateProfileForm.value.username as string
65      const website = this.updateProfileForm.value.website as string
66      const avatar_url = this.updateProfileForm.value.avatar_url as string
67
68      const { error } = await this.supabase.updateProfile({
69        id: user.id,
70        username,
71        website,
72        avatar_url,
73      })
74      if (error) throw error
75    } catch (error) {
76      if (error instanceof Error) {
77        alert(error.message)
78      }
79    } finally {
80      this.loading = false
81    }
82  }
83
84  async signOut() {
85    await this.supabase.signOut()
86  }
87}
src/app/account/account.component.html1<form [formGroup]="updateProfileForm" (ngSubmit)="updateProfile()" class="form-widget">
2  <div>
3    <label for="email">Email</label>
4    <input id="email" type="text" [value]="session.user.email" disabled />
5  </div>
6  <div>
7    <label for="username">Name</label>
8    <input formControlName="username" id="username" type="text" />
9  </div>
10  <div>
11    <label for="website">Website</label>
12    <input formControlName="website" id="website" type="url" />
13  </div>
14
15  <div>
16    <button type="submit" class="button primary block" [disabled]="loading">
17      {{ loading ? 'Loading ...' : 'Update' }}
18    </button>
19  </div>
20
21  <div>
22    <button class="button block" (click)="signOut()">Sign Out</button>
23  </div>
24</form>
启动
现在我们已经有了所有的组件,让我们来更新AppComponent。
src/app/app.component.ts1import { Component, OnInit } from '@angular/core'
2import { SupabaseService } from './supabase.service'
3
4@Component({
5  selector: 'app-root',
6  templateUrl: './app.component.html',
7  styleUrls: ['./app.component.css'],
8})
9export class AppComponent implements OnInit {
10  title = 'angular-user-management'
11
12  session = this.supabase.session
13
14  constructor(private readonly supabase: SupabaseService) {}
15
16  ngOnInit() {
17    this.supabase.authChanges((_, session) => (this.session = session))
18  }
19}
src/app/app.component.html1<div class="container" style="padding: 50px 0 100px 0">
2  <app-account *ngIf="session; else auth" [session]="session"></app-account>
3  <ng-template #auth>
4    <app-auth></app-auth>
5  </ng-template>
6</div>
app.module.ts also needs to be modified to include the ReactiveFormsModule from the @angular/forms package.
src/app/app.module.ts1import { NgModule } from '@angular/core'
2import { BrowserModule } from '@angular/platform-browser'
3
4import { AppComponent } from './app.component'
5import { AuthComponent } from './auth/auth.component'
6import { AccountComponent } from './account/account.component'
7import { ReactiveFormsModule } from '@angular/forms'
8import { AvatarComponent } from './avatar/avatar.component'
9
10@NgModule({
11  declarations: [AppComponent, AuthComponent, AccountComponent, AvatarComponent],
12  imports: [BrowserModule, ReactiveFormsModule],
13  providers: [],
14  bootstrap: [AppComponent],
15})
16export class AppModule {}
一旦完成,在终端窗口运行这个程序。
npm run start
然后打开浏览器到localhost:4200,你应该看到完成的应用程序。
简介照片
每个Supabase项目都配置了存储,用于管理照片和视频等大文件。
创建一个上传小部件
让我们为用户创建一个头像,以便他们可以上传个人资料照片。
用ng g c avatarAngular CLI命令创建一个AvatarComponent。
src/app/avatar/avatar.component.ts1import { Component, EventEmitter, Input, OnInit, Output } from '@angular/core'
2import { SafeResourceUrl, DomSanitizer } from '@angular/platform-browser'
3import { SupabaseService } from '../supabase.service'
4
5@Component({
6  selector: 'app-avatar',
7  templateUrl: './avatar.component.html',
8  styleUrls: ['./avatar.component.css'],
9})
10export class AvatarComponent implements OnInit {
11  _avatarUrl: SafeResourceUrl | undefined
12  uploading = false
13
14  @Input()
15  set avatarUrl(url: string | null) {
16    if (url) {
17      this.downloadImage(url)
18    }
19  }
20
21  @Output() upload = new EventEmitter<string>()
22
23  constructor(private readonly supabase: SupabaseService, private readonly dom: DomSanitizer) {}
24
25  ngOnInit(): void {}
26
27  async downloadImage(path: string) {
28    try {
29      const { data } = await this.supabase.downLoadImage(path)
30      if (data instanceof Blob) {
31        this._avatarUrl = this.dom.bypassSecurityTrustResourceUrl(URL.createObjectURL(data))
32      }
33    } catch (error) {
34      if (error instanceof Error) {
35        console.error('Error downloading image: ', error.message)
36      }
37    }
38  }
39
40  async uploadAvatar(event: any) {
41    try {
42      this.uploading = true
43      if (!event.target.files || event.target.files.length === 0) {
44        throw new Error('You must select an image to upload.')
45      }
46
47      const file = event.target.files[0]
48      const fileExt = file.name.split('.').pop()
49      const filePath = `${Math.random()}.${fileExt}`
50
51      await this.supabase.uploadAvatar(filePath, file)
52      this.upload.emit(filePath)
53    } catch (error) {
54      if (error instanceof Error) {
55        alert(error.message)
56      }
57    } finally {
58      this.uploading = false
59    }
60  }
61}
src/app/avatar/avatar.component.html1<div>
2  <img
3    *ngIf="_avatarUrl"
4    [src]="_avatarUrl"
5    alt="Avatar"
6    class="avatar image"
7    style="height: 150px; width: 150px"
8  />
9</div>
10<div *ngIf="!_avatarUrl" class="avatar no-image" style="height: 150px; width: 150px"></div>
11<div style="width: 150px">
12  <label class="button primary block" for="single">
13    {{ uploading ? 'Uploading ...' : 'Upload' }}
14  </label>
15  <input
16    style="visibility: hidden;position: absolute"
17    type="file"
18    id="single"
19    accept="image/*"
20    (change)="uploadAvatar($event)"
21    [disabled]="uploading"
22  />
23</div>
添加新的小组件
然后我们可以在账户组件的html模板上面添加小部件。
src/app/account.component.html1<form [formGroup]="updateProfileForm" (ngSubmit)="updateProfile()" class="form-widget">
2  <app-avatar [avatarUrl]="this.avatarUrl" (upload)="updateAvatar($event)"> </app-avatar>
3  <!-- input fields -->
4</form>
并在AccountComponent typescript文件中加入updateAvatar函数和avatarUrl获取器。
src/app/account.component.ts1@Component({
2  selector: 'app-account',
3  templateUrl: './account.component.html',
4  styleUrls: ['./account.component.css'],
5})
6export class AccountComponent implements OnInit {
7  // ...
8  get avatarUrl() {
9    return this.updateProfileForm.value.avatar_url as string
10  }
11
12  async updateAvatar(event: string): Promise<void> {
13    this.updateProfileForm.patchValue({
14      avatar_url: event,
15    })
16    await this.updateProfile()
17  }
18  // ...
19}
下一步
在这个阶段,你已经有了一个功能完备的应用程序!
- 有问题吗?在此提问.
- 请登录MemFire Cloud