Posts社交网络论坛
MemFire Cloud是一款提供云数据库,用户可以创建云数据库,并对数据库进行管理,还可以对数据库进行备份操作。它还提供后端即服务,用户可以在1分钟内新建一个应用,使用自动生成的API和SDK,访问云数据库、对象存储、用户认证与授权等功能,可专注于编写前端应用程序代码,加速WEB或APP应用开发。
本篇文章将会教大家手把手使用MemFire Cloud做一个Posts社交网络论坛应用。我们基于Posts社交网络论坛应用做了一个详细的教程,来讲一讲在通过MemFire Cloud开发Posts社交网络论坛应用的开发步骤及注意事项,希望能真正解决用户使用MemFire Cloud过程中遇到的问题和提供一些应用实现的小技巧。
开发前需要知道的一些事
应用介绍
一个开放的社交网络论坛,任何人都可以在这里分享他们的想法和意见。
应用基础
Posts社交网络论坛是基于supabase官网的一个todo-list应用示例为基础,在这个基础上进行修改,删除,增加一些代码逻辑及功能的应用。
开发条件
您需要对vue3及ts有一定的了解;
您需要对sql语法有一定的了解;
开发依赖
"@supabase/supabase-js": "^1.1.2"
"vue": "^3.0.0"
“node.js”:"14.19.0"
"npm":"6.14.16"
1.准备工作#
创建应用
登录https://cloud.memfiredb.com 创建应用,打开应用后,查看并获取服务地址以及token信息
创建应用的一步很关键,我们的posts应用就是通过在这里创建的应用来获得数据库、对象存储等一系列资源,并将获得该应用专属的API访问链接和访问密钥,用户可以轻松的与以上资源进行交互。想知道关于应用更详细的内容请查看查看文档
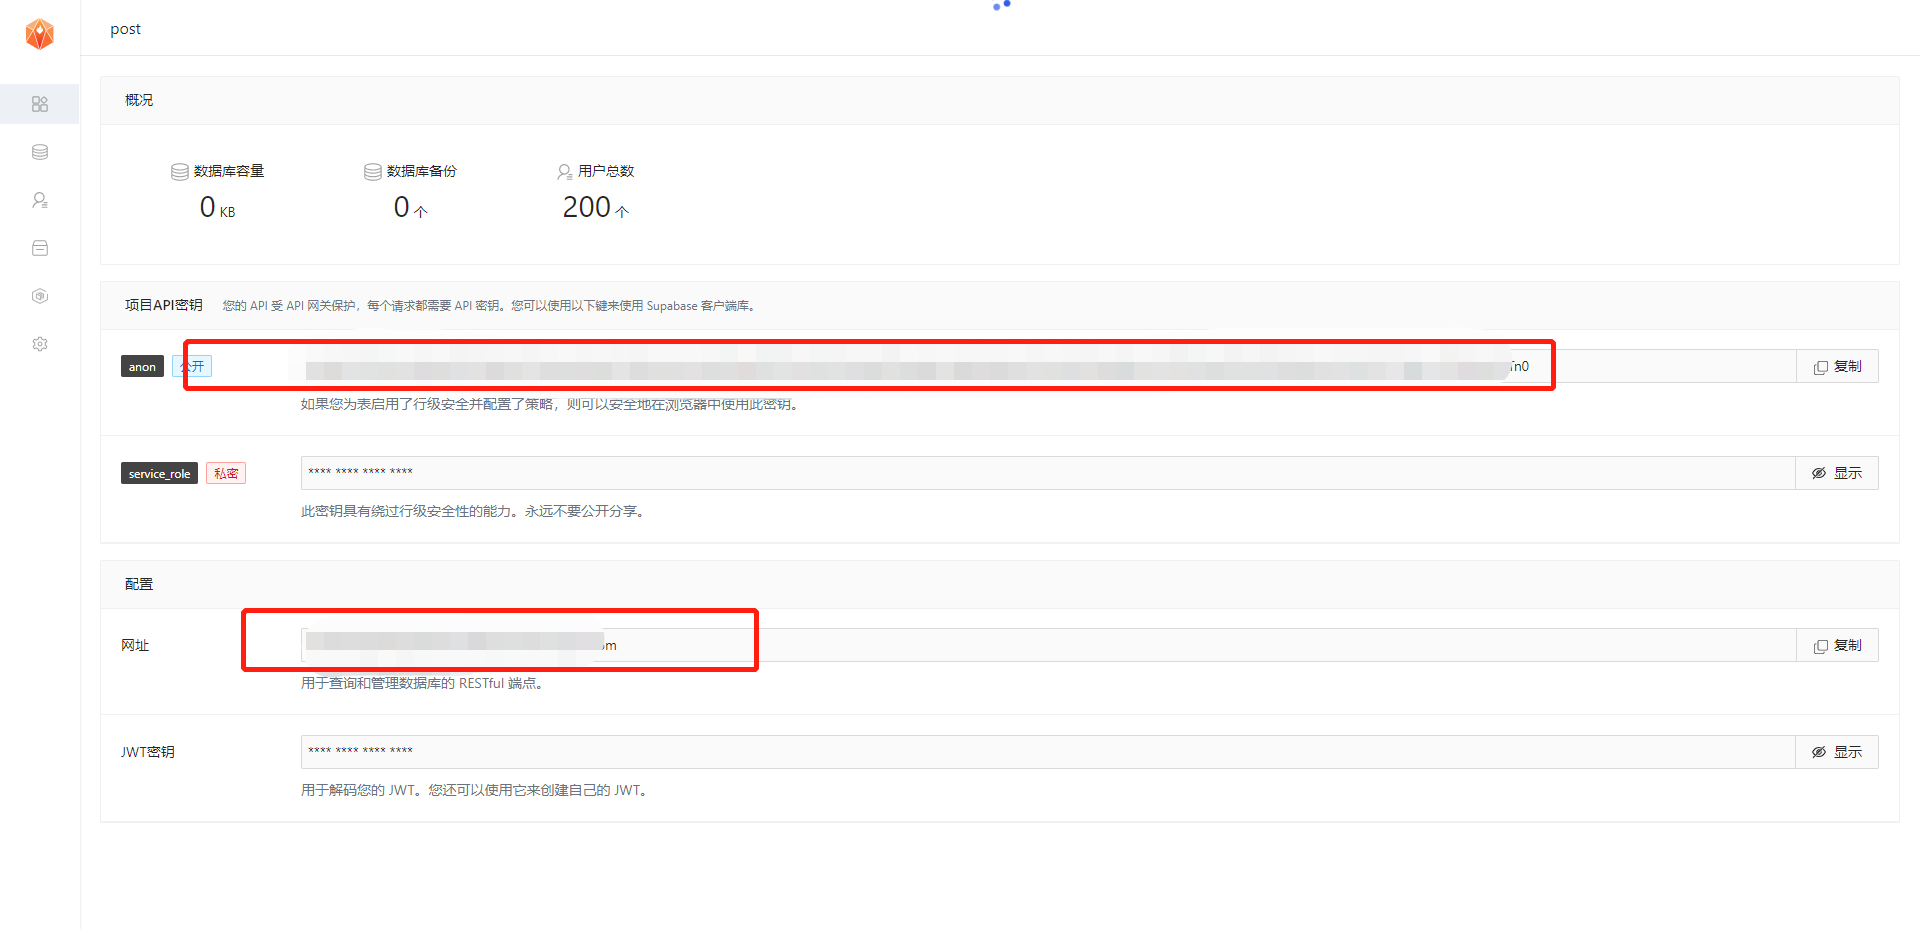
进入应用,我们在这里可以看到,Anon public是客户端API密钥。它允许“匿名访问”您的数据库,直到用户登录。登录后,密钥将切换到用户自己的登录令牌。这将为数据启用行级安全性。
注意:service_role secret可以绕过任何安全策略完全访问您的数据。这些密钥必须保密,并且要在服务器环境中使用,决不能在客户端或浏览器上使用。
在后续示例代码中,需要提供supabaseUrl和supabaseKey。
supabaseUrl就是上图的网址链接,supabaseKey就是Anon API密钥
想知道关于应用的连接更详细的内容请查看文档
下载代码
todo-list模板代码(需要下载,选择项目为supabase /examples/vue3-ts-todo-list):
git clone https://gitee.com/memfiredb/supabase
Posts最终代码
git clone https://github.com/LucaRao/memfire-post.git
2.修改项目名称#
将项目名vue3-ts-todo-list改为Posts
3.配置访问密钥#
每个Supabase项目都有一个独特的API URL。您的 API 在一个 API 网关的保护下,每次请求都需要一个 API 密钥。
将上一步中获取的anon public和网址分别设置到supabaseUrl和supabaseKey中
(1)将根目录下的.env.local.example改为.env.local
(2)supabaseUrl和supabaseKey分别赋值给VUE_APP_SUPABASE_URL和VUE_APP_SUPABASE_KEY
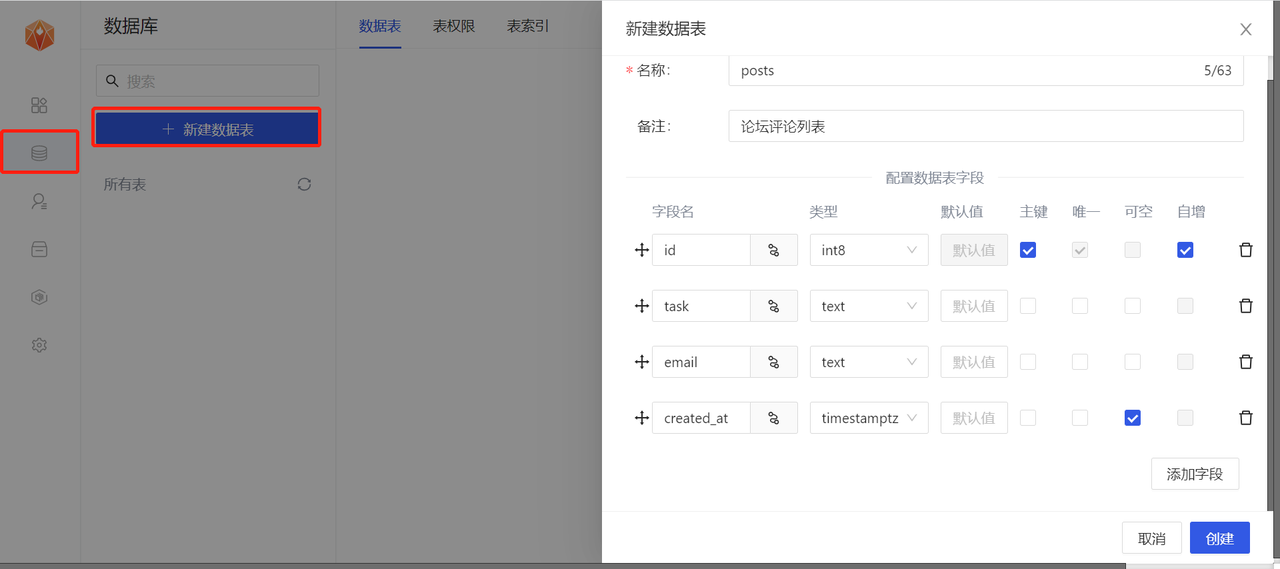
4.表结构初始化#
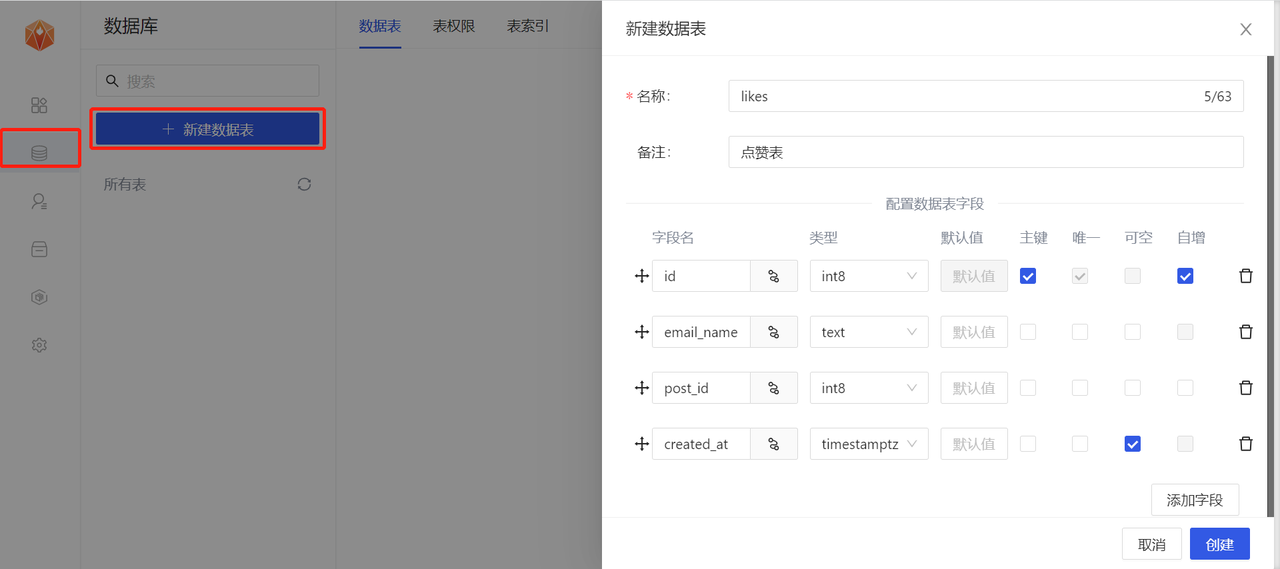
接下来我们需要创建数据表,posts表是用来存储用户论坛评论的数据,likes表用来存储用户点赞的某条评论的数据。
数据表结构:
posts(论坛评论列表)
| 名称 | 类型 | 描述 |
|---|---|---|
| id | in8 | 主键,自增,每条评论的唯一标识ID |
| task | text | 评论 |
| text | 用户名 | |
| created_at | timestamptz | 日期,可为空 |
likes(点赞表)
| 名称 | 类型 | 描述 |
|---|---|---|
| id | int8 | 主键,自增,每条评论的唯一标识ID |
| email_name | text | 用户名 |
| post_id | int8 | 每条评论的唯一id |
| created_at | timestamptz | 日期,可为空 |
sql初始化语句
1drop table if EXISTS public.posts;
2drop table if EXISTS public.likes;
3
4create table public.posts (
5  id bigint generated by default as identity primary key,
6  email varchar(255),
7  task text check (char_length(task) > 3),
8  created_at timestamp with time zone default timezone('utc'::text, now()) not null
9);
10
11create table public.likes (
12  id bigint generated by default as identity primary key,
13  email_name varchar(255),
14  post_id int not null ,
15  created_at timestamp with time zone default timezone('utc'::text, now()) not null
16);
5.注册登录功能#
运行项目
npm install

npm run serve
注册、登录、退出登录等功能在vue3-todo-list里已经实现,我们不必再次写一遍,也不需要修改文件里面的代码。
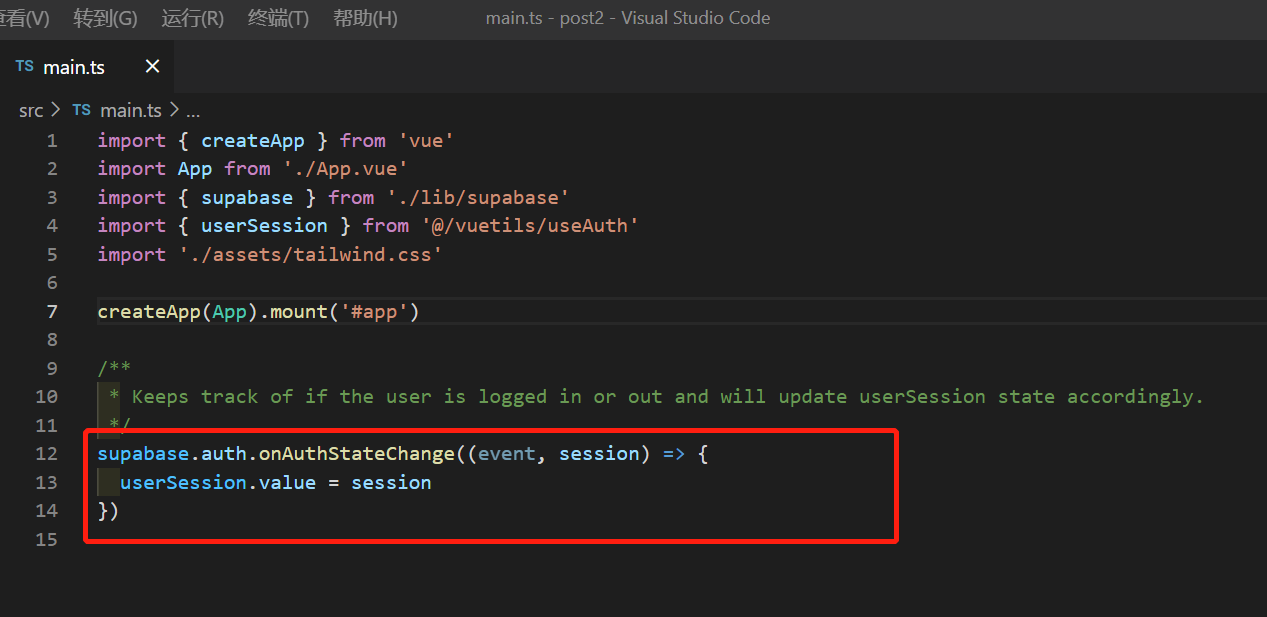
原理
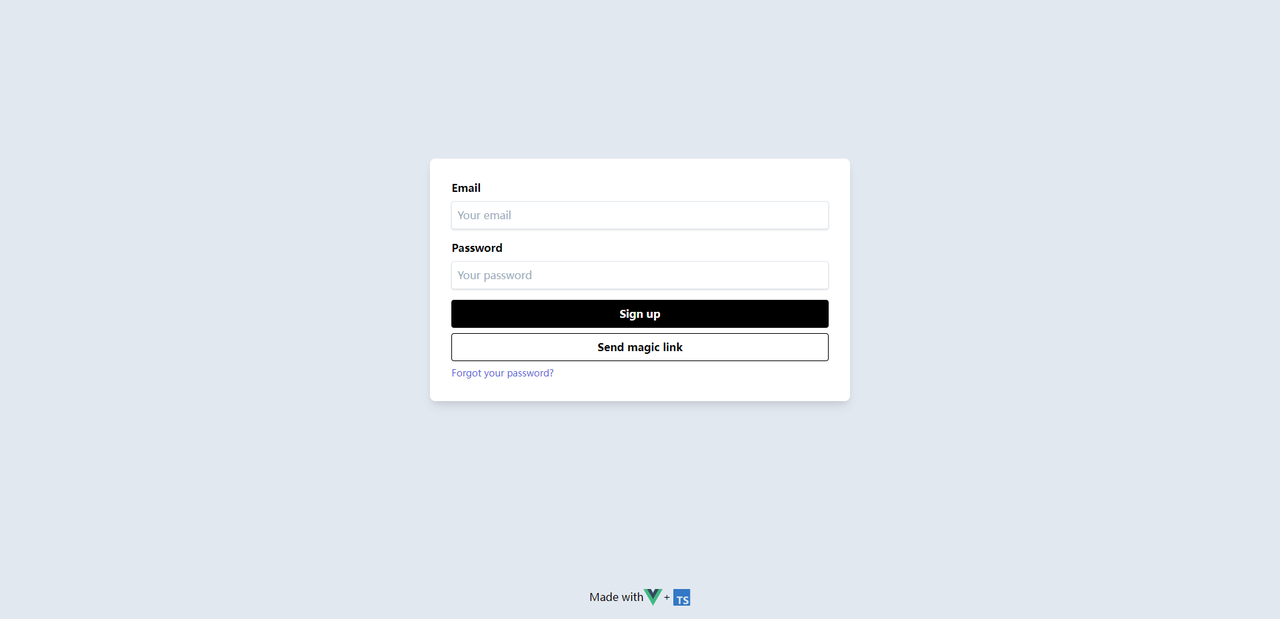
打开Posts/src/compinents/Auth.vue
应用的登录、注册、退出登录的逻辑和页面在这里。登录、注册、退出登录都是通过引入的Posts/src/vuetils/useAuth.ts文件里面的相应功能的api来进行交互的,supabase官网提供的todo-list应用的demo已经在useAuth.ts文件里给我们写好了这些功能的接口。
在Posts/src/vuetils/useAuth.ts文件中看到,在引入supabase依赖之后,我们的登录、注册等功能的api都是由supabase规定熟成的api名称,比如登录叫supabase.auth.signIn,注册叫supabase.auth.signUp。具体查看文档
我们来创建一个用户并且尝试登录
控制台显示注册并登录成功,并且已经将我们的用户信息存入了userSession中
6.实现发布评论功能#
(1)修改数据类型(ts语法用到数据类型校验)
打开Posts/src/types/global.ts修改为
1declare interface Credentials {
2  email?: string | undefined
3  password?: string | undefined
4  provider?: 'bitbucket' | 'github' | 'gitlab' | 'google' | undefined
5}
6
7declare interface Todo {
8  id?: number
9  email?: string
10  task: string
11  inserted_at?: string
12}
(2)编写页面逻辑
1.打开Posts/src/compinents/TodoList.vue
2.修改页面样式,用户名这里我们使用邮箱“@”符号之前的字符串。
修改template页面为
1<template>
2  <div class="w-full">
3    <h2 class="mb-12 font-bold text-3xl">Write a new post</h2>
4    <h2 class="mb-12 font-bold text-2xl">welcome { {userSession.user.email.substring(0,userSession.user.email.indexOf('@'))} }!</h2>
5    <div class="flex gap-2 my-2">
6      <input
7        v-model="task"
8        class="rounded w-full p-2"
9        type="text"
10        placeholder="What do you need to?"
11      />
12      <button @click="insertTask" class="btn-black">
13        Publish
14      </button>
15    </div>
16
17    <div class="bg-white shadow overflow-hidden rounded-md" style="height: 300px;overflow-y: scroll;">
18      <ul v-for="(todo, index) in allTodos" :key="index">
19        <suspense>
20        <Todo :todo="todo" />
21        </suspense>
22      </ul>
23    </div>
24  </div>
25</template>
3.在该页面搜索insertTask方法,这是发布的按钮,将发布论坛评论方法的参数改为email和task
1const todo = await addTodo({ email: userSession.value.user.email, task: task.value})
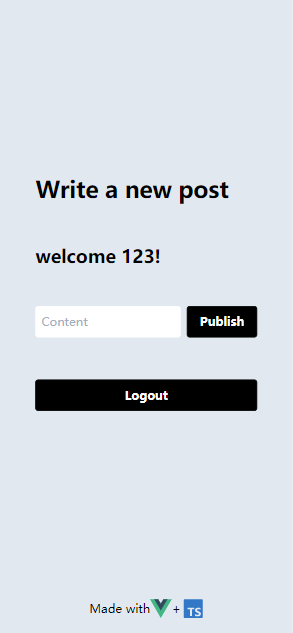
下图就是登录后修改的posts首页
页面引入的Posts/src/vuetils/useTodo.ts文件是用来请求posts列表数据和新增一条post相应功能交互的api的方法
打开Posts/src/vuetils/useTodo.ts文件
由于我们修改了表名称,但是逻辑并没有修改,只需要替换查询表名,所以我们将fetchTodos方法里面的查询posts列表语法修改为
1const { data: todos, error } = await supabase.from('posts').select('*').order('id')
同上,我们将addTodo里面的新增post语法改为
1const { data, error } = await supabase.from('posts').insert(todo).single()
现在我们在页面插入一条数据,观察控制台的network的接口请求情况,显示插入成功
7.渲染评论列表和点赞功能#
打开Posts/src/components/Todo.vue页面,我们要先把页面样式做以下修改
Template
1<template>
2  <li
3    class="
4      block
5      cursor-pointer
6      hover:bg-gray-200
7      focus:outline-none focus:bg-gray-200
8      transition
9      duration-150
10      ease-in-out
11      border-style1
12    "
13  >
14    <div class="flex items-center px-4 py-4 sm:px-6">
15      <div class="min-w-0 flex-1 flex items-center">
16        <div class="text-sm leading-5 font-medium truncate t-s">{ { todo.task } }</div>
17      </div>
18      <button @click="toggleLike" class="w-4 h-4 ml-2  hover:border-black rounded">
19        <svg
20          v-if="like"
21          xmlns="http://www.w3.org/2000/svg"
22          xmlns:xlink="http://www.w3.org/1999/xlink"
23          width="24px"
24          height="24px"
25          preserveAspectRatio="xMidYMid meet"
26          viewBox="0 0 256 256"
27        >
28          <path
29            d="M236.023 92c0 30.565-17.713 62.005-52.648 93.446a317.34 317.34 0 0 1-51.442 37.534a8 8 0 0 1-7.819 0c-4.25-2.38-104.09-59.117-104.09-130.98a60.02 60.02 0 0 1 108-36.04a60.02 60.02 0 0 1 108 36.04z"
30            fill="currentColor"
31          ></path>
32        </svg>
33        <svg
34          v-else
35          xmlns="http://www.w3.org/2000/svg"
36          xmlns:xlink="http://www.w3.org/1999/xlink"
37          width="24px"
38          height="24px"
39          preserveAspectRatio="xMidYMid meet"
40          viewBox="0 0 256 256"
41        >
42          <path
43            d="M128.018 228a11.995 11.995 0 0 1-5.864-1.53C117.82 224.043 16.018 166.18 16.018 92a64.028 64.028 0 0 1 112-42.378a64.028 64.028 0 0 1 112 42.378c0 74.18-101.803 132.043-106.137 134.47a11.995 11.995 0 0 1-5.863 1.53zm-48-176a40.046 40.046 0 0 0-40 40c0 51.222 67.445 97.186 88 110c20.554-12.814 88-58.778 88-110a40.009 40.009 0 0 0-76.928-15.408a12 12 0 0 1-22.145 0A39.923 39.923 0 0 0 80.018 52z"
44            fill="currentColor"
45          ></path>
46        </svg>
47      </button>
48    </div>
49    <div class="flex items-center px-4 py-4 sm:px-6 t-m">
50      { {todo.email.substring(0, todo.email.indexOf('@'))} }
51    </div>
52  </li>
53</template>
Css
1<style lang="css" scoped>
2.border-style1 {
3  border: 1px solid #d5d0d0;
4  margin: 20px 15px;
5  border-radius: 10px;
6}
7.t-s {
8  font-size: 14px;
9  font-weight: bold;
10}
11.t-m {
12  font-size: 13px;
13  font-weight: normal;
14  margin-top: -20px;
15}
16</style>
在Todo.vue列表组件中,我们需要展示所有用户的评论、用户名、当前用户是否点赞,列表的数据我们已经在TodoList.vue的fetchTodos方法中拿到,并且传递给了Todo.vue子组件。接下来我们编写点赞接口的逻辑。
刷新点赞方法:
原理:likes表里面包含所有当前用户的点赞数据,是通过当前用户的用户名email与遍历当前一条数据的post的id与likes表里面的email_name和post_id是否匹配进行查询,这是一个组件的循环遍历查询,每查一次,看是否查到数据,查到数据则表示该用户给当前的评论点了赞,即为带有当前用户点赞的数据,有的话将当前一条数据的like改为有数据即为true,爱心点亮
步骤:
1.在Todo.vue引入文件
1import { defineComponent, ref } from 'vue'
2
3import { supabase } from '@/lib/supabase'
4
5import { userSession } from '@/vuetils/useAuth'
2.将Todo.vue逻辑代码都清空,加上下面的刷新点赞的方法
1const fecthLike = async () => {
2      const { data } = await supabase
3        .from('likes')
4        .select('*')
5        .match({
6          post_id: props.todo.id,
7          email_name: userSession?.value?.user?.email || '',
8        })
9        if(data?.length){
10          like.value = data[0]
11        } else {
12            like.value = null
13        }
14  }
切换点赞的方法:
每次切换完都要刷新一下点赞
原理:
点赞就在likes表里添加一条用户用户名email_name和post_id的数据,取消点赞就删除此条数据
3.增加以下代码
1const toggleLike = async () => {
2      if (like.value) {
3        await supabase
4          .from('likes')
5          .delete()
6          .match({
7            post_id: props.todo.id,
8            email_name: userSession?.value?.user?.email || '',
9          })
10      } else {
11        await supabase
12          .from('likes')
13          .insert({
14            post_id: props.todo.id,
15            email_name: userSession?.value?.user?.email,
16          })
17          .single()
18      }
19    fecthLike()
20    }
Todo.vue完整代码
1<template>
2  <li
3    class="
4      block
5      cursor-pointer
6      hover:bg-gray-200
7      focus:outline-none focus:bg-gray-200
8      transition
9      duration-150
10      ease-in-out
11      border-style1
12    "
13  >
14    <div class="flex items-center px-4 py-4 sm:px-6">
15      <div class="min-w-0 flex-1 flex items-center">
16        <div class="text-sm leading-5 font-medium truncate t-s">{{ todo.task }}</div>
17      </div>
18      <button @click="toggleLike" class="w-4 h-4 ml-2  hover:border-black rounded">
19        <svg
20          v-if="like"
21          xmlns="http://www.w3.org/2000/svg"
22          xmlns:xlink="http://www.w3.org/1999/xlink"
23          width="24px"
24          height="24px"
25          preserveAspectRatio="xMidYMid meet"
26          viewBox="0 0 256 256"
27        >
28          <path
29            d="M236.023 92c0 30.565-17.713 62.005-52.648 93.446a317.34 317.34 0 0 1-51.442 37.534a8 8 0 0 1-7.819 0c-4.25-2.38-104.09-59.117-104.09-130.98a60.02 60.02 0 0 1 108-36.04a60.02 60.02 0 0 1 108 36.04z"
30            fill="currentColor"
31          ></path>
32        </svg>
33        <svg
34          v-else
35          xmlns="http://www.w3.org/2000/svg"
36          xmlns:xlink="http://www.w3.org/1999/xlink"
37          width="24px"
38          height="24px"
39          preserveAspectRatio="xMidYMid meet"
40          viewBox="0 0 256 256"
41        >
42          <path
43            d="M128.018 228a11.995 11.995 0 0 1-5.864-1.53C117.82 224.043 16.018 166.18 16.018 92a64.028 64.028 0 0 1 112-42.378a64.028 64.028 0 0 1 112 42.378c0 74.18-101.803 132.043-106.137 134.47a11.995 11.995 0 0 1-5.863 1.53zm-48-176a40.046 40.046 0 0 0-40 40c0 51.222 67.445 97.186 88 110c20.554-12.814 88-58.778 88-110a40.009 40.009 0 0 0-76.928-15.408a12 12 0 0 1-22.145 0A39.923 39.923 0 0 0 80.018 52z"
44            fill="currentColor"
45          ></path>
46        </svg>
47      </button>
48    </div>
49    <div class="flex items-center px-4 py-4 sm:px-6 t-m">
50      { {todo.email.substring(0, todo.email.indexOf('@'))} }
51    </div>
52  </li>
53</template>
54
55<script lang="ts">
56import { defineComponent, PropType, ref } from 'vue'
57/* eslint-disable @typescript-eslint/camelcase */
58import { supabase } from '@/lib/supabase'
59import { userSession } from '@/vuetils/useAuth'
60
61export default defineComponent({
62  name: 'Todo',
63  props: {
64    todo: {
65      type: Object,
66      required: true,
67    },
68  },
69  setup(props) {
70    const like = ref<undefined | null>(undefined)
71    const fecthLike = async () => {
72      const { data } = await supabase
73        .from('likes')
74        .select('*')
75        .match({
76          post_id: props.todo.id,
77          email_name: userSession?.value?.user?.email || '',
78        })
79        if(data?.length){
80          like.value = data[0]
81        } else {
82            like.value = null
83        }
84  }
85    fecthLike()
86    // Removes todo from supbase and also from app state
87    const toggleLike = async () => {
88      if (like.value) {
89        await supabase
90          .from('likes')
91          .delete()
92          .match({
93            post_id: props.todo.id,
94            email_name: userSession?.value?.user?.email || '',
95          })
96      } else {
97        await supabase
98          .from('likes')
99          .insert({
100            post_id: props.todo.id,
101            email_name: userSession?.value?.user?.email,
102          })
103          .single()
104      }
105    fecthLike()
106    }
107
108    return { toggleLike, userSession,like,fecthLike }
109  },
110
111})
112</script>
113
114<style lang="css" scoped>
115.border-style1 {
116  border: 1px solid #d5d0d0;
117  margin: 20px 15px;
118  border-radius: 10px;
119}
120.t-s {
121  font-size: 14px;
122  font-weight: bold;
123}
124.t-m {
125  font-size: 13px;
126  font-weight: normal;
127  margin-top: -20px;
128}
129</style>
小技巧:
具体的增删改查的语法可以参考文档
重启一下项目,登录后我们来新增一条数据,新增成功,点赞也成功了!
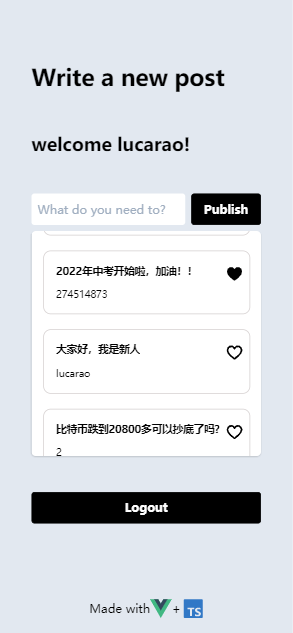
简单的post应用即完成!
写在结尾的话
以上就是基于一个教程示例对MemFire Cloud的使用和反馈的一些看法,如果在开发中遇到问题,可以参考上面的完整代码项目比对,希望对大家有所帮助。